15 Aug / Portuguese Egg Tarts (Pastéis de Nata)

Sort of randomly, I came across an article extolling the wonders of pastéis de nata, or Portuguese egg tarts, in a British magazine of all places!
Now I’ve not had true Portuguese egg tarts, but many a dan taht (romanized for 蛋挞, ‘egg’ in Chinese, and ‘tart’)– those irresistible Hong Kong-style egg tarts — has slid into my happy belly.
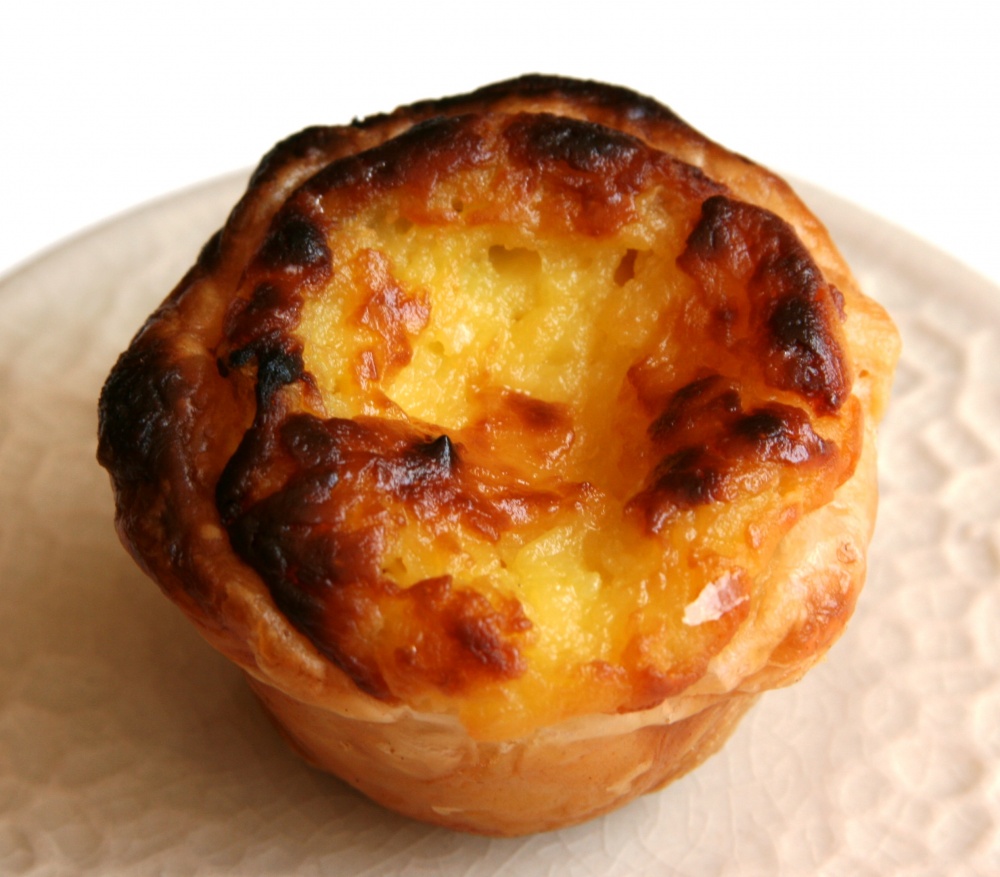
After a little more research, I found out that pastéis de nata were created in a monastery in Belém, Lisbon over two centuries ago. These delicate custard-filled puff pastry tarts have signature brown-black splotches, a result of the high heat they’re baked at. The tarts traveled with Portuguese colonials to Macau, and eventually made their way to Hong Kong where they evolved to become a staple at dim sum restaurants and beyond.
I’m not much of a baker and I’ve never tried making egg tarts in any shape or form but the recipes I came across online made it seem so simple, especially if you use store bought pastry! Using recipes on Leitesculinaria.com and Asiandumplingtips.com as guidelines, I devised a recipe.
Reality wasn’t quite as reassuring. Buying the pastry was easy; preventing the custard from curdling–not so much. And trying to acquire the umbra of burnt patches atop the custard was close to hellish. I feared for my oven when I turned it up to 500F (the highest it would go!), especially when it locked itself up and decided it was going to ‘clean’ mode.
Following Andrea Nguyen’s cue on her blog, I decided to bake the pastries at a lower temperature and switch to broil to finish them off.
As with many things in life, I chalked it up to a learning process. And I did learn a few lessons about egg tarts, and myself!
1. I’ve come across Hong Kong-style egg tarts with shells made from both short crust and flaky, puff pastry and I’ve always wondered why the two variations. I’m guessing that puff pastry is a legacy of the Portuguese egg tart while short crust pastry comes from the Queen. Well, not exactly, but Hong Kong used to be a British colony and traditional English custard tarts are made with short crust pastry.
2. Don’t expect Portuguese egg tarts in Macau to be the same as they are in Portugal. As with many foods, the recipe evolved to take on local characteristics—cornstarch instead of wheat flour, the non-sprinkling of powdered sugar or cinnamon, etc.
3. Egg tarts were born from happenstance. According to this article, convents and monasteries in 19th century Portugal used large quantities of egg whites for starching clothes (e.g. nuns’ habits and monks’ cassocks) and the leftover egg yolks were turned into cakes and pastries which were often sold to raise money.
4. I want, no, need, a crème brulée torch. If I had one, I could easily create the bruléed top peculiar to Portuguese egg tarts, stress-free!
5. Sometimes, perfection is futile and even unnecessary. Hard as I tried, I couldn’t achieve the smooth glossy sheen and deep brown patches as seen here. In the end, I decided my tarts still tasted amazing so I wasn’t going to worry if my custard puckered or if their tops weren’t adequately splotched.
These tarts may not be on par with the originals from Pastéis de Belém in Portugal or the famous specimens from Macau’s Lord Stow’s Bakery but I can live with that.
Have you come across excellent Portuguese egg tarts in your hometown?
~~~
Portuguese Egg Tarts (Pastéis de Nata)
The recipes I found flavored their custards with vanilla extract, cinnamon and/or lemon peel. Next time, I’ll try dropping a vanilla bean, pandan leaf, or orange blossom water into my custard. Regardless, you’ll be rewarded with a crispy, flaky shell and a soft, gooey custard filling.
Time: 1 hr 30 mins, 30 mins active
Makes: 2 dozen small tarts
5 teaspoons cornstarch
1/3 cup heavy cream
2/3 cups whole milk
1/4 cup sugar (use less if you don’t like it too sweet)
A pinch of salt
3 large egg yolks
1 (1-1/2 inch) cinnamon stick (optional)
1/4 teaspoon vanilla extract
17.5 ounces frozen puff pastry, thawed according to package directions (you should have 2 sheets)
1. To make the custard, combine the cornstarch and cream in a small, heavy-bottomed saucepan. Whisk until the cornstarch is dissolved. Add the milk, sugar, salt, and egg yolks. Whisk until smooth, then add the cinnamon stick.
2. Cook the custard over medium-low heat, stirring frequently with a whisk or wooden spoon for about 10 minutes, until the custard thickens to the consistency of heavy cream but not as thick as lemon curd. Start stirring continuously from the 6 minute mark and scrape the cornstarch from the bottom of the pot to ensure even cooking. Remove from the heat and stir in the vanilla extract.
3. Pour the custard through a sieve into a small bowl and cover with a piece of plastic wrap, making sure the plastic makes contact with the custard. This prevents a skin from forming. Set aside to cool. Makes about 1 cup.
4. Roll one puff pastry sheet out into a rectangle. Starting from the long edge closest to you, roll tightly into a log about 1-inch thick. Roll a few more times to make a smooth seal and pat the sides flat. Wrap the log loosely with plastic wrap, and refrigerate for 15 minutes.
5. Position the oven rack about 6 inches away from your broiler. In my oven, this was the second rung from the top. Preheat the oven to 425F. Lightly grease a 12-cup mini-muffin pan.
6. Remove the pastry log from the refrigerator and cut it in half. Keep one half wrapped and refrigerated.
Cut the log into 6 even pieces. Take one piece, and flatten it out into a circle using your thumbs and index fingers. Press the pastry against the bottom of the cup, up its sides and gently push the dough above the rim to form a thin lip.
7. Pour the custard into each cup until 3/4 full, about 1 tablespoon.
8. Slide the muffin pan into the oven and bake for 18 to 20 minutes, until the custard has puffed up and the pastry is golden brown. There should be a smattering of little burnt spots. If not, and if you really want them, switch to broiler mode on high (mine was set to 500F) and broil for 1 to 2 minutes, until little burnt spots appear. Monitor the tarts closely! Some charred bits on the pastry add character but totally blackened pastry isn’t tasty. And honestly, the splotches are just cosmetic. The tarts will still be yummy regardless!
9. Remove from the oven and cool for 5 minutes. Lift the tarts gently out of the muffin pan using tongs or two tablespoons. Return the oven temperature to 425F. Let the muffin pan cool. Wipe clean and repeat with remaining pastry and custard.
10. Serve the tarts warm. Leftovers can be reheated in a toaster oven or preheated 300F oven for about 5 minutes, until warm.
Note: Home ovens can’t get as hot as commercial ovens so I wouldn’t worry if you don’t achieve the dark brown splotches unique to Portuguese egg tarts.


This is great! I wrote about Hong Kong egg tarts for CFCH during the summer. Although I personally like the pastry puff version better, it was easier for me to make the shortbread crust version. I’ve heard that the shortbread crust version comes from the custard tarts common in UK.
http://www.festival.si.edu/2014/foodways-friday-hong-kong-egg-tarts/
Hi Karlie, I’m with you. I’d never make puff pastry from scratch, too much of a hassle. But I personally prefer the shortcrust pastry version anyway. I’ll have to try your recipe for dan taat!
If you’re ever in SF Chinatown, check out the dan tats from Golden Gate Bakery! They have a flakier crust, which I really like and they’re the best I’ve had in the Bay Area.